That glowing traffic at night or silky waterfall effect always feels like something only professional cameras can capture, but iphone long exposure photography completely changed that for me.
After experimenting with different methods, I realized the iPhone already has powerful tools built in, and once you understand how to use them properly, capturing motion becomes surprisingly simple and incredibly rewarding.
How Long Exposure Works On iPhone
Understanding how your iPhone creates motion effects will help you control the outcome better.
Smart Image Processing Creates Motion Blur
Your iPhone does not rely on a traditional shutter staying open like a DSLR. Instead, it uses computational photography through Live Photos. This feature captures multiple frames before and after you press the shutter, then blends them into a single image that simulates motion blur.
Once I understood this, it became easier to plan shots instead of guessing. The effect depends on movement in the scene and how stable the phone remains during capture.
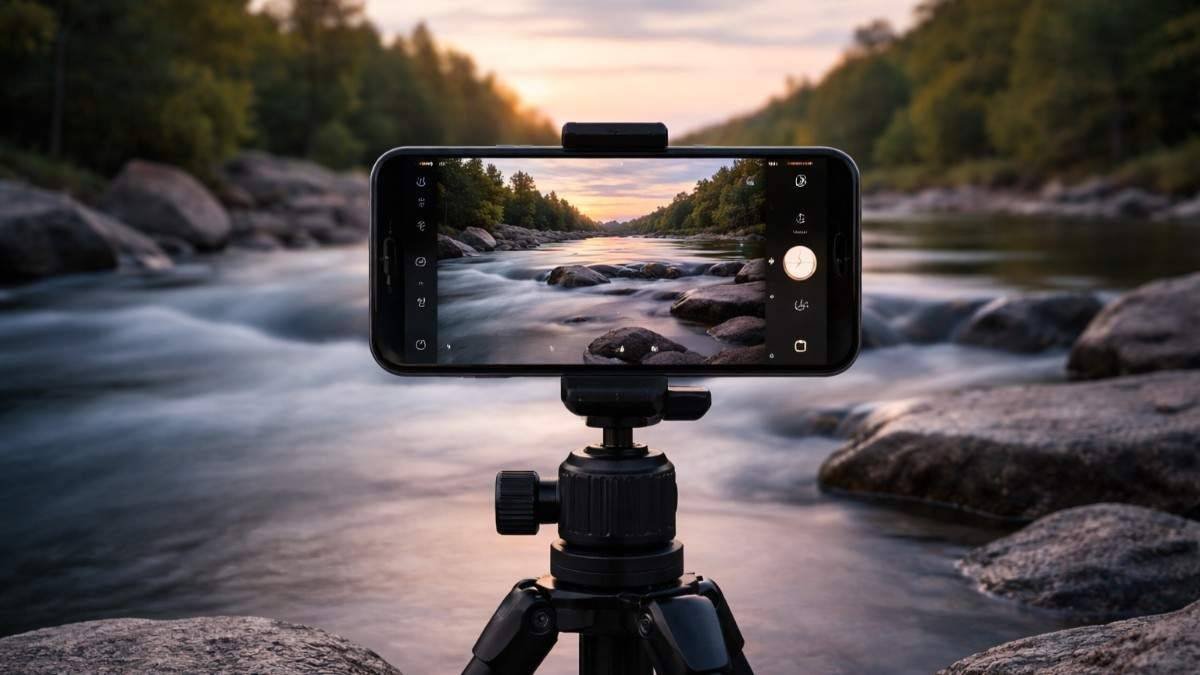
Keeping Your Phone Steady Matters
One of the biggest lessons learned from real shooting is that stability matters more than any setting. Even slight movement can ruin the effect by blurring everything instead of just the moving parts.
Using a tripod or placing the phone on a solid surface ensures the background stays sharp while motion becomes smooth and artistic.
Best Scenes To Practice Long Exposure
Not every scene works well for this style. Motion is the key ingredient. Flowing water, busy streets, moving clouds, and crowds create the most visually appealing results.
Whenever I look for a shot now, I focus on movement first. Without motion, there is no long exposure effect.
Simple Ways To Capture Motion Shots On iPhone
There are multiple ways to create long exposure shots, each useful in different situations.
Method 1 The Native Live Photo Trick
This is the easiest and most accessible way to start. Open your camera and make sure Live Photos is enabled using the circular icon at the top.
Take a photo of a moving subject while keeping your phone steady. After capturing, open the image in the Photos app, tap the Live option or swipe up, and select Long Exposure. This instantly transforms your image into a motion-blurred shot without needing any extra tools.
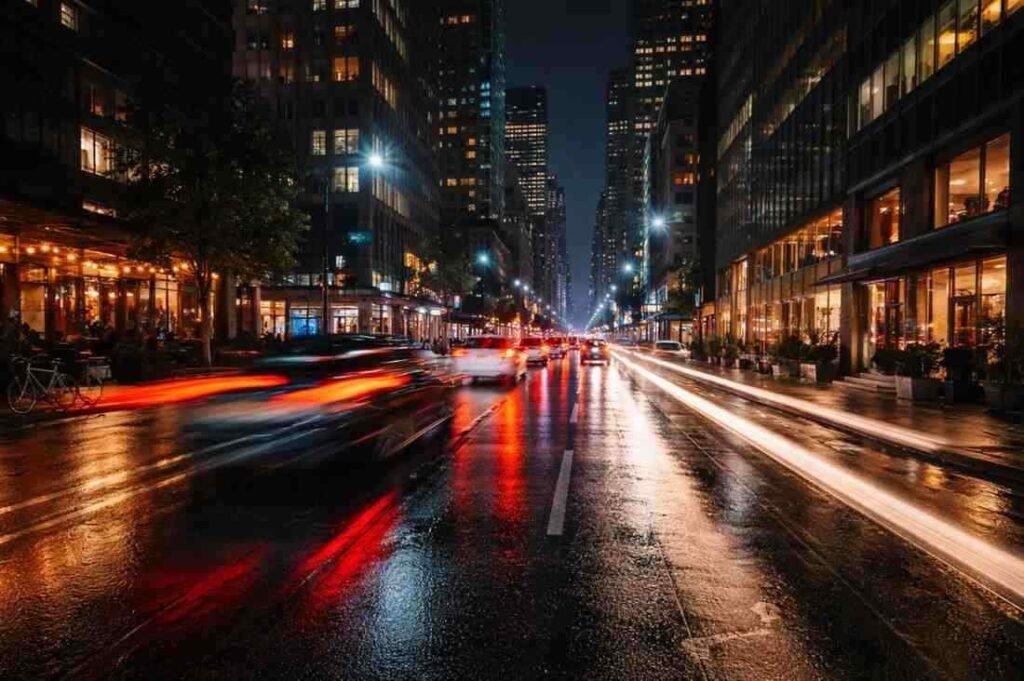
Method 2 Using Night Mode For Longer Exposure
Night Mode is perfect for low light scenes like city streets or night skies. It activates automatically when lighting conditions are low.
When holding the phone, exposure time may be limited to around ten seconds. However, placing your iPhone on a tripod unlocks longer exposures up to thirty seconds. This allows you to capture more dramatic light trails and detailed night scenes.

Method 3 Using Professional Camera Apps
For more control, third party apps are incredibly useful. Apps like Slow Shutter Cam, ReeHeld, and Moment Pro Camera allow you to adjust shutter speed manually and create true long exposure shots.
These apps are especially helpful during daylight when you want precise control or when Live Photos does not produce the desired effect. They also allow creative experimentation with motion blur and light trails.
Essential Setup Tips For Better Results
A few simple habits can completely transform your results.
Use A Tripod For Sharp Images
Long exposure requires stillness. Even slight hand movement can ruin the shot. A tripod ensures the background remains sharp while motion stays smooth. If you do not have one, placing your phone on a stable surface works surprisingly well.
Use Remote Shutter To Avoid Shake
Touching the screen can introduce small vibrations. Using a remote trigger like Apple Watch or headphone buttons helps eliminate this issue. This small adjustment made a noticeable difference in my results.
Use VND Filters For Daytime Shooting
Bright light can overexpose your image. A Variable Neutral Density filter reduces the amount of light entering the lens, allowing you to capture longer exposures even during the day. This is especially useful when using professional apps for more advanced shots.
Creative Ideas For iPhone Long Exposure Photography
This is where you can go beyond basics and create something unique.
Capture Light Trails In Busy Streets
City traffic creates beautiful streaks of light when captured correctly. Position your phone where vehicles move consistently through the frame. The longer the movement, the more dramatic the effect becomes.
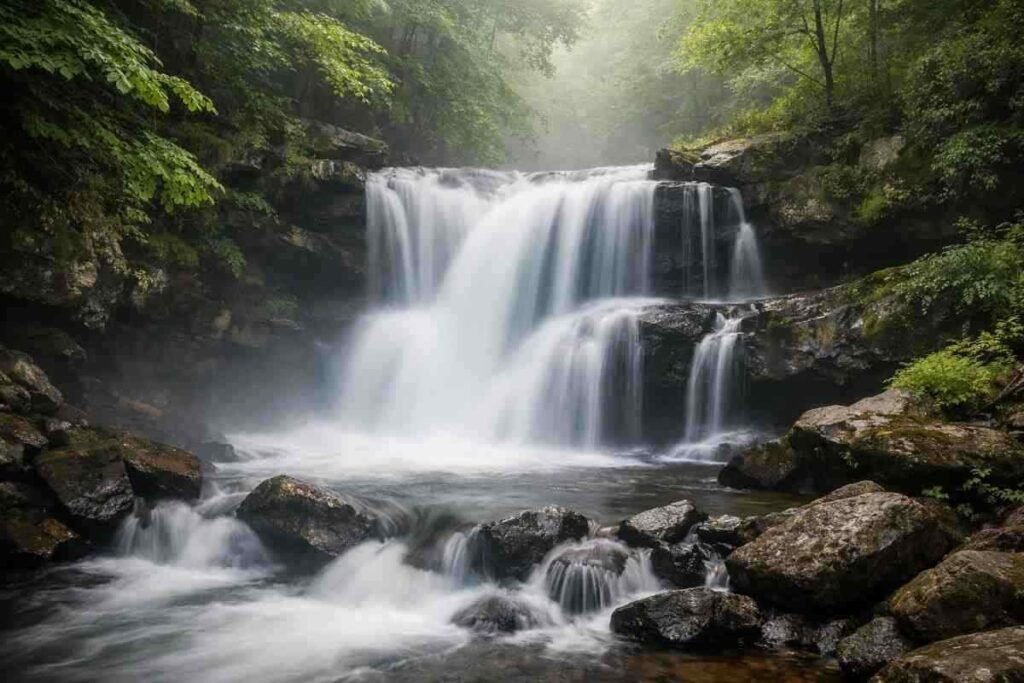
Turn Water Into Smooth Silk
Waterfalls, rivers, and waves become soft and dreamy with long exposure. Even a small stream can look cinematic when captured this way. This technique works best in low light or shaded areas.
Create Motion Blur With People
Crowded areas allow you to blur movement while keeping buildings sharp. This creates a storytelling effect that adds life to your photos. It works especially well in markets, streets, and public spaces.
How To Take Long Exposure Photographs
Here is the exact process that consistently works for me.
- Start by finding a scene with clear movement such as traffic or flowing water.
- Place your iPhone on a tripod or stable surface to eliminate shake. Open the camera and turn on Live Photos, ensuring your frame includes both moving and static elements for contrast. Capture the image while keeping the phone completely still.
- After taking the shot, open it in the Photos app and access the Live options. Select Long Exposure and observe how motion is blended smoothly.
- If the effect looks weak, repeat the process in lower light or with more movement in the scene. For advanced control, switch to a professional app and adjust exposure manually to achieve stronger results.
Common Mistakes To Avoid In Long Exposure Shots
Avoiding these will instantly improve your photography.
Shooting Without Stability
A shaky phone results in a blurry image overall. Always stabilize your device before capturing the shot. Even a small movement can ruin the final result.
Ignoring Movement In The Frame
Without motion, the effect does not work. Always look for dynamic elements in your scene before taking the photo. Movement is what creates the visual impact.
Overexposing The Image
Too much light can wash out details. Adjust exposure or use filters to maintain balance. This is especially important during daytime shooting.
Frequently Asked Questions
1. Can iPhone long exposure photography be done without apps?
Yes, Live Photos allow you to create long exposure effects without any additional apps.
2. Is a tripod necessary for long exposure shots?
A tripod is highly recommended because it keeps the image sharp and prevents unwanted blur.
3. What is the best lighting for long exposure photography?
Low light conditions such as evening or night work best for achieving strong motion effects.
4. Why do my long exposure photos look blurry?
Blurry results usually happen due to camera shake or too much light in the scene.
Click What You See!
Exploring iphone long exposure photography has completely changed how I approach everyday scenes. What once looked ordinary now feels full of creative potential. With the right method, proper stability, and a bit of experimentation, capturing smooth motion becomes second nature. The more you practice, the more confident and creative your results will become.